How to Make a Woodworking Jewelry Box at Home?
Creating a woodworking jewelry box at home can be a rewarding endeavor. It combines craftsmanship with creativity, allowing you to produce something unique. According to a recent report by the Furniture and Woodworking Association, the market for luxury woodworking products has grown by 18% annually. This trend indicates a rising interest in handcrafted items like jewelry boxes.
Expert craftsman Michael Bratton emphasizes, "A woodworking jewelry box is not just functional; it’s a piece of art." This insight highlights the dual purpose of these boxes: they serve as storage and as statement pieces. However, achieving this is not always straightforward. Many beginners face challenges, from selecting the right wood to mastering joinery techniques.
Mistakes often happen, and not every project turns out as envisioned. It's essential to approach woodworking with patience and a willingness to learn. The beauty lies in the journey and the craftsmanship involved. Every scratch and misalignment is part of the process. Embrace these imperfections as opportunities for growth and improvement. Building a woodworking jewelry box could be the perfect way to start this fulfilling journey.
Choosing the Right Materials for Your Jewelry Box Project
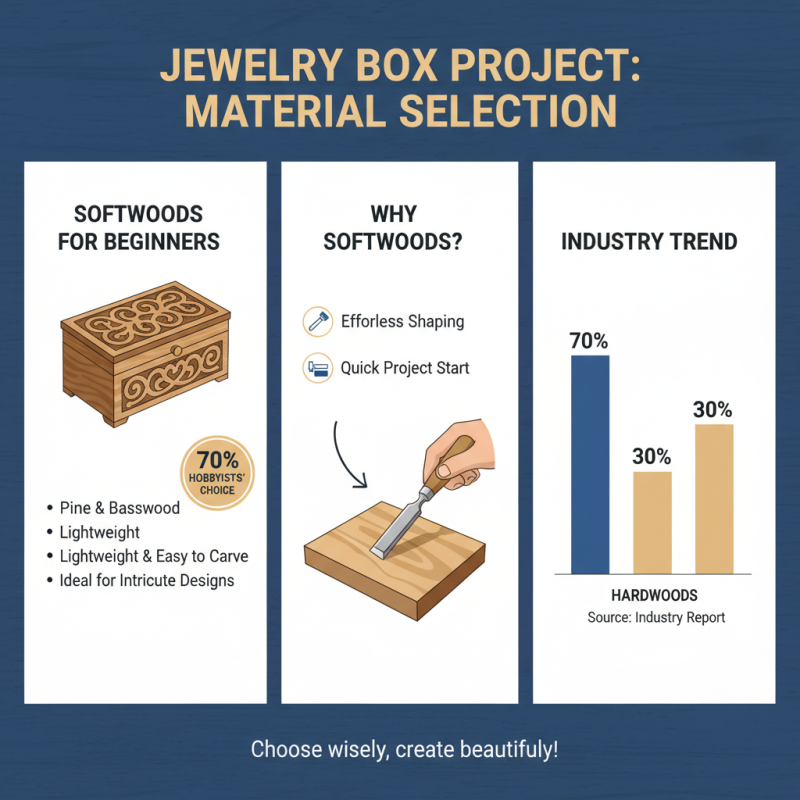
When starting your jewelry box project, choosing the right materials is crucial. Softwoods like pine are often recommended because they are lightweight and easy to work with. According to a recent industry report, about 70% of hobbyists prefer softwoods for beginner projects. These woods can be carved and shaped effortlessly, which is ideal for intricate designs.
Hardwoods, however, offer durability and a polished finish. Oak and maple are excellent choices for more experienced crafters. They provide a resistance to wear, which adds value to your final product. A study revealed that boxes made from hardwoods retain over 90% of their original value appraised after five years. This data shows a long-term investment.
Don't overlook the importance of wood grain and color. Natural variations can make your piece truly unique. Pay attention to alignment and defects in the wood. An error in selection can lead to frustration during assembly. A mismatched grain pattern or a hidden knot may detract from the overall look. Taking time to select the right piece can save a lot of headaches later on.
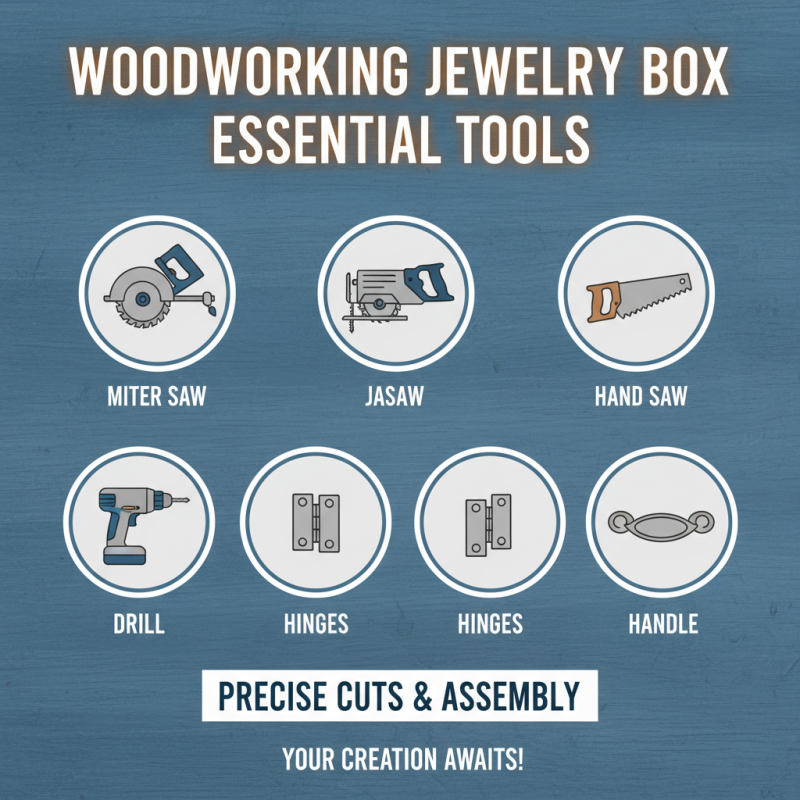
Essential Tools Needed for Woodworking a Jewelry Box
Creating a woodworking jewelry box requires a few essential tools. You will start with a saw, preferably a miter saw or a jigsaw. These will help you cut wood into precise pieces. A quality hand saw is also useful for smaller cuts. Don't forget a drill for making holes, especially when adding hinges or a decorative handle.
Sandpaper is crucial for smoothing rough edges. It helps achieve that polished look on your box. You will need various grits of sandpaper, as different stages of work require different textures. A wood chisel can also aid in refining details. Sometimes, you must go back and correct uneven edges, which is a normal part of the process.
Using a measuring tape is essential for accuracy. Oversized or undersized pieces can ruin your project. A square tool can ensure right angles for corners, avoiding frustrating misalignments later. Clamps will hold your pieces together while the glue dries. This is often a painstaking wait, as it can be hard to resist touching your work too early. Remember, every mistake teaches something valuable.
Step-by-Step Instructions for Building the Jewelry Box Frame
Creating a woodworking jewelry box can be rewarding. Let’s focus on the frame, which forms its backbone. Start with selecting quality wood. Pine or oak are good options. Measure and cut your pieces carefully. Each cut should be precise for a good fit. Mistakes are common. Take your time to avoid extra sanding later.
Assembling the frame requires patience. Use wood glue to join the pieces. Secure them with clamps until the glue dries. This step takes focus. An uneven surface may create issues. If the frame wobbles, it’s hard to fix. Remember to check for square corners. If they're off, remeasure and adjust. Sanding follows. Use different grits for smoothness.
You might face challenges during this process. A crooked cut can lead to frustration. Don't rush; give yourself breaks. Reflect on what went wrong. Learning comes from mistakes. Finally, the joy of seeing your box take shape makes it worthwhile.
Woodworking Jewelry Box Materials Overview
Finishing Touches: Sanding and Staining Your Jewelry Box
Sanding is crucial in making your jewelry box smooth and attractive. Begin with a coarse-grit sandpaper. Sand along the grain to avoid scratches. This step helps remove any rough edges and imperfections. Transition to finer grit sandpaper for a polished finish. Aim to make every surface touchable and soft.
After sanding, it’s time to stain your box. Choose a color that highlights the wood’s beauty. Apply the stain with a clean cloth or brush. Be mindful of the amount; too much can lead to streaks. Wipe off excess after a few minutes. The color often appears darker when first applied. It's essential to halt and observe how it dries.
Sometimes, the results may not meet your expectations. Perhaps the stain looks uneven, or the surface is not as smooth. Don’t panic. You can always sand it down and try again. Each attempt teaches you something new. Experiment, and don’t be afraid to adjust your techniques. The process is just as important as the final piece.
How to Make a Woodworking Jewelry Box at Home? - Finishing Touches: Sanding and Staining Your Jewelry Box
| Step |
Description |
Tools Needed |
Materials Needed |
| 1 |
Select and prepare your wood pieces. |
Saw, measuring tape. |
Wood (e.g., pine, oak). |
| 2 |
Cut wood pieces to size according to design. |
Band saw or miter saw. |
Wood pieces. |
| 3 |
Assemble the box structure using glue and clamps. |
Wood glue, clamps. |
Wood pieces, glue. |
| 4 |
Sand all surfaces to achieve a smooth finish. |
Sanding block or electric sander. |
Sandpaper (various grits). |
| 5 |
Stain the wood to your desired color and finish. |
Brush or cloth for application. |
Wood stain. |
| 6 |
Apply a protective finish such as varnish or lacquer. |
Brush, spray can. |
Varnish or lacquer. |
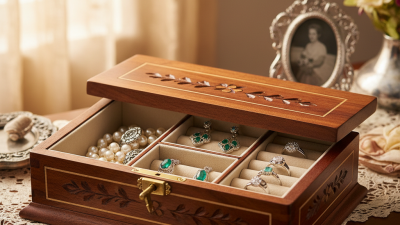
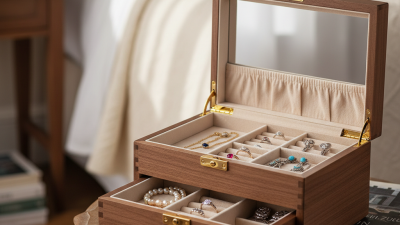
Adding Compartments and Lining for Jewelry Storage
Creating compartments in your woodworking jewelry box can elevate both its function and aesthetic. Start by measuring the interior space. Decide how many compartments you need. A simple design might include one large space for larger items and smaller sections for rings and earrings. Use lightweight wood for dividers. Cut pieces to fit snugly. Make sure they are equal in height for a neat look.
Lining your compartments is a crucial step. Soft fabric or felt can prevent scratches and keep your jewelry in good condition. Measure and cut the lining to fit each compartment precisely. Use a strong adhesive to secure it. Don't rush this step. Misaligned edges can be glaringly obvious. Consider adding a small flap or removable dividers for added flexibility. Mistakes can happen here, so test different lining techniques. A well-lined box adds charm and protects your treasured pieces. Remember, imperfections are part of the craft and can enhance the character of your project.